Adding a Webwork link to your Moodle course

More Important updates Sept. 1 2025
This set of instructions was updated again to account for some missing field values, please review below.
Important Update August 26, 2025
This process has changed with the latest Moodle upgrade. Please see the new steps below.
It is worth keeping in mind that the Moodle was upgraded mid-august and this Webwork<->Moodle LTI has not been thoroughly tested. If you have any issues you can email me directly at twelch@tru.ca.
Hi all, Webwork is a homework system developed to support courses in Mathematics, Statistics and Physics. To make things more seamless you are able to add External Tool links (also called an LTI) in your Moodle course to the Webwork course(s) that you wish to make available to your students. Here’s how to do that.
Getting Webwork Courses & Authentication
We have configured the server in such a way that:
- Faculty can access Webwork either directly or via the LTI. You will have a separate password for the Webwork server but can change it to match your Campus ID password for convenience.
- Students can only access Webwork via LTI (external tool links) in their Moodle courses.
So, the first thing you will need is a Webworks course and an account on the Webworks server. Please request your Webwork accounts/courses using the TRU Faculty Webwork Course Requests Form.
If you have any questions, please contact Moodle Support (moodlesupport@tru.ca).
Set up your Webwork course
It is probably best to get your Webwork course set up before adding the LTI link in your Moodle course. You can access the Webwork system directly via: https://webwork.tru.ca/webwork2. You will see a screen similar to the following with all the public courses listed:
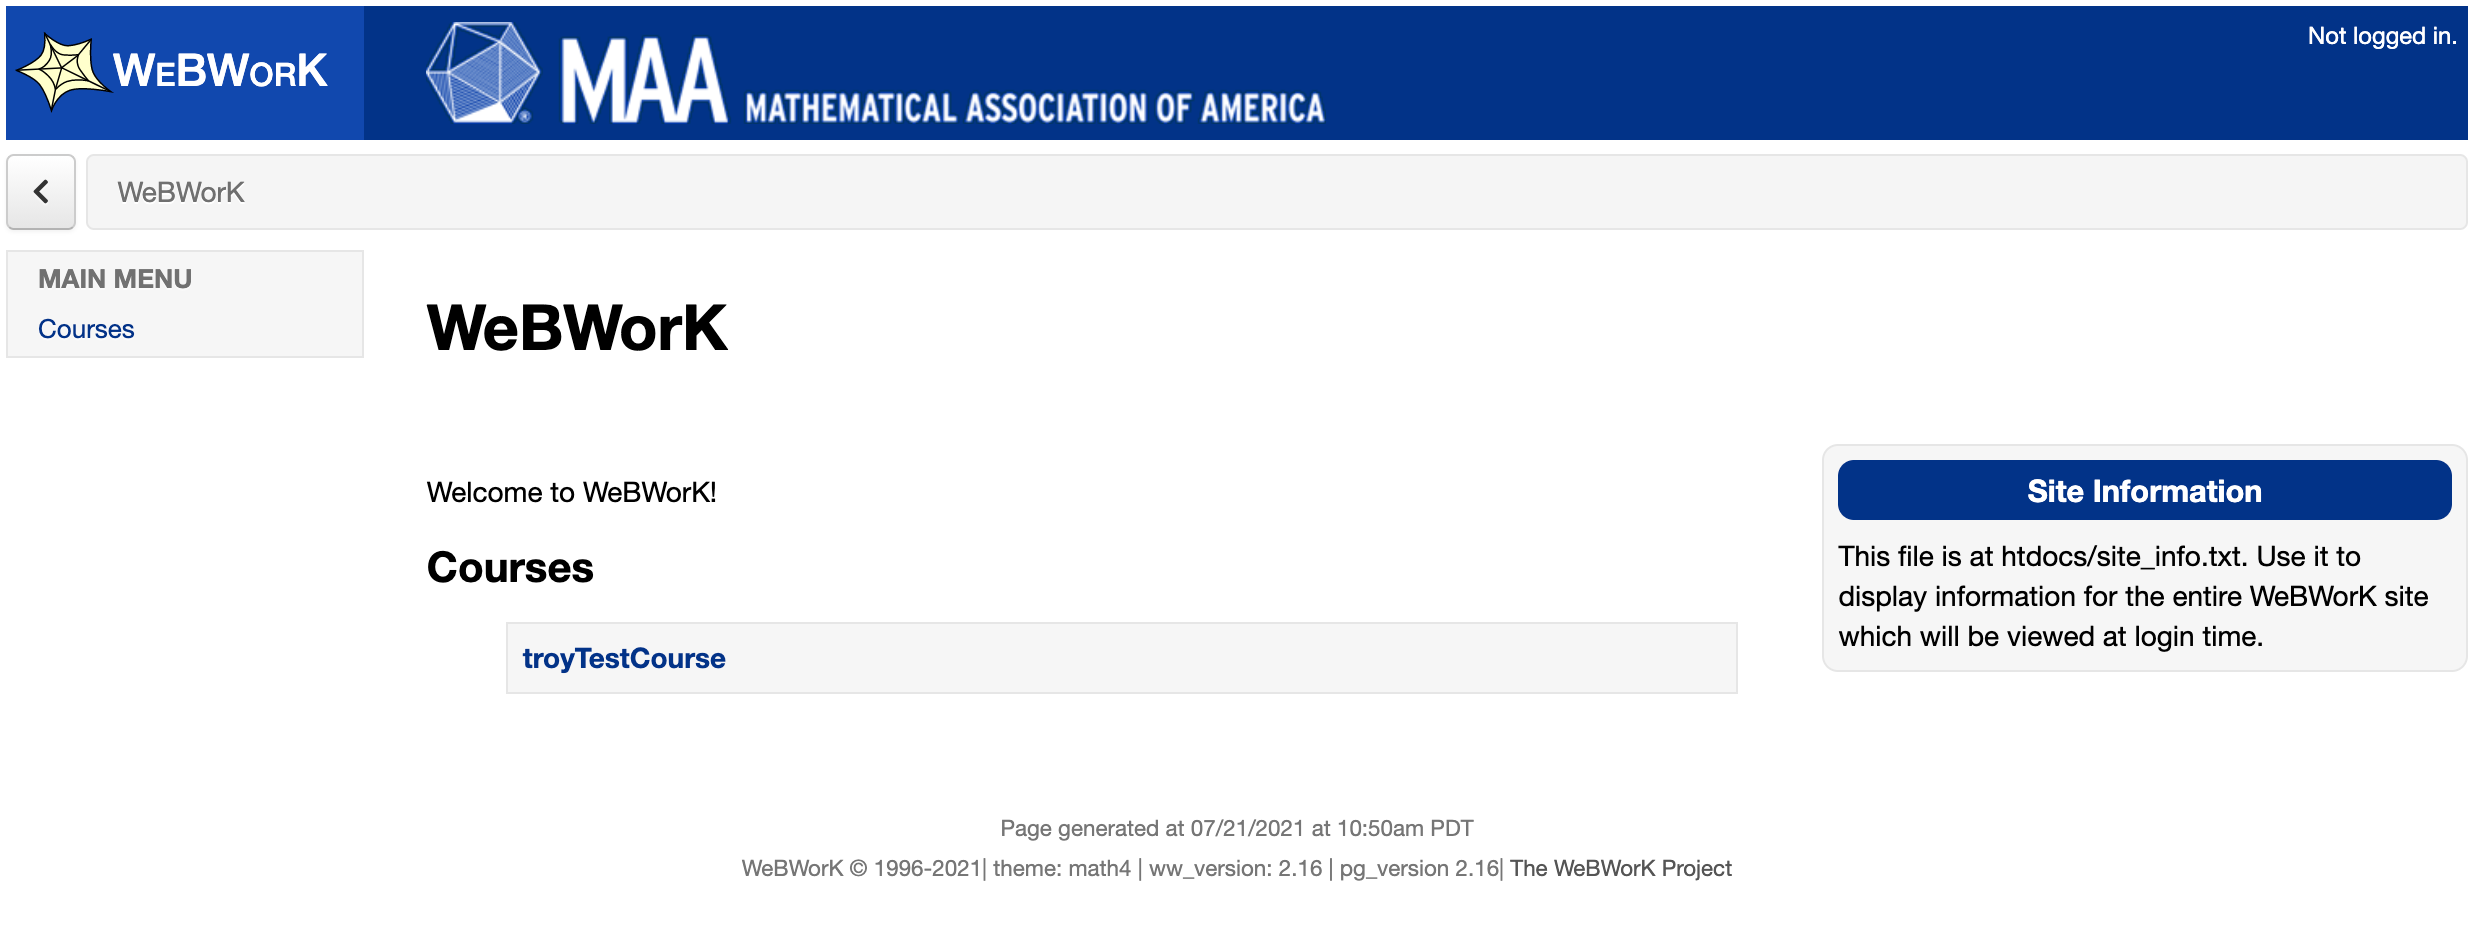
As you can see only the troyTestCourse exists so far in the above image. You can also see in the upper right a message indicating Not logged in.
When you click on a course link you are taken to the login screen.
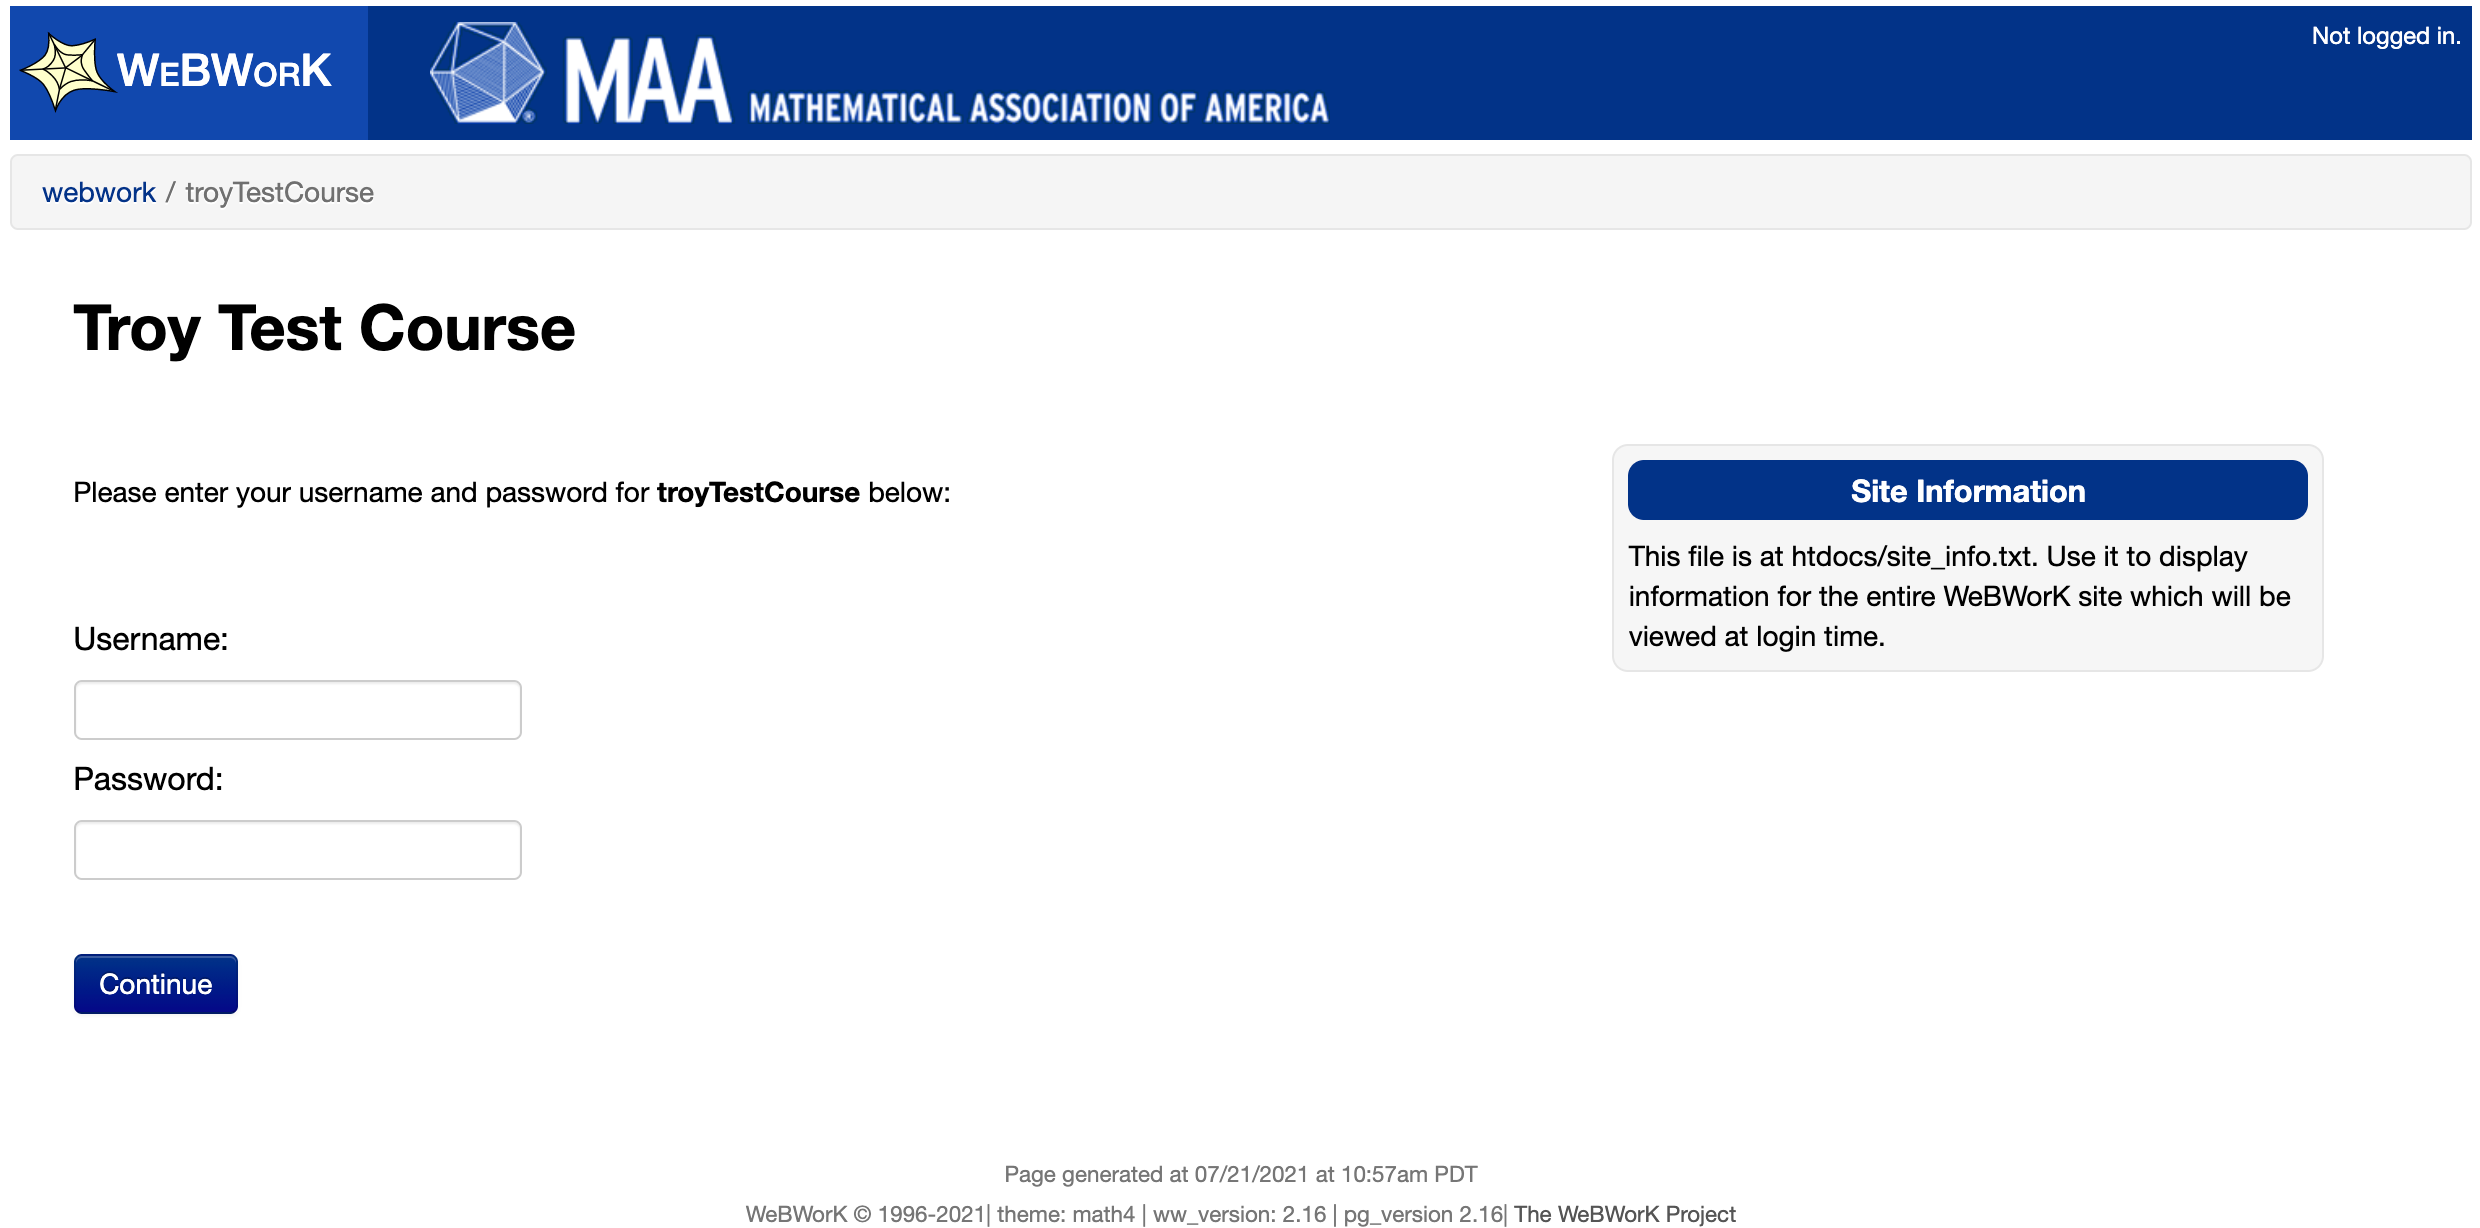
Enter your username and password and you will be taken to the landing page for your course.
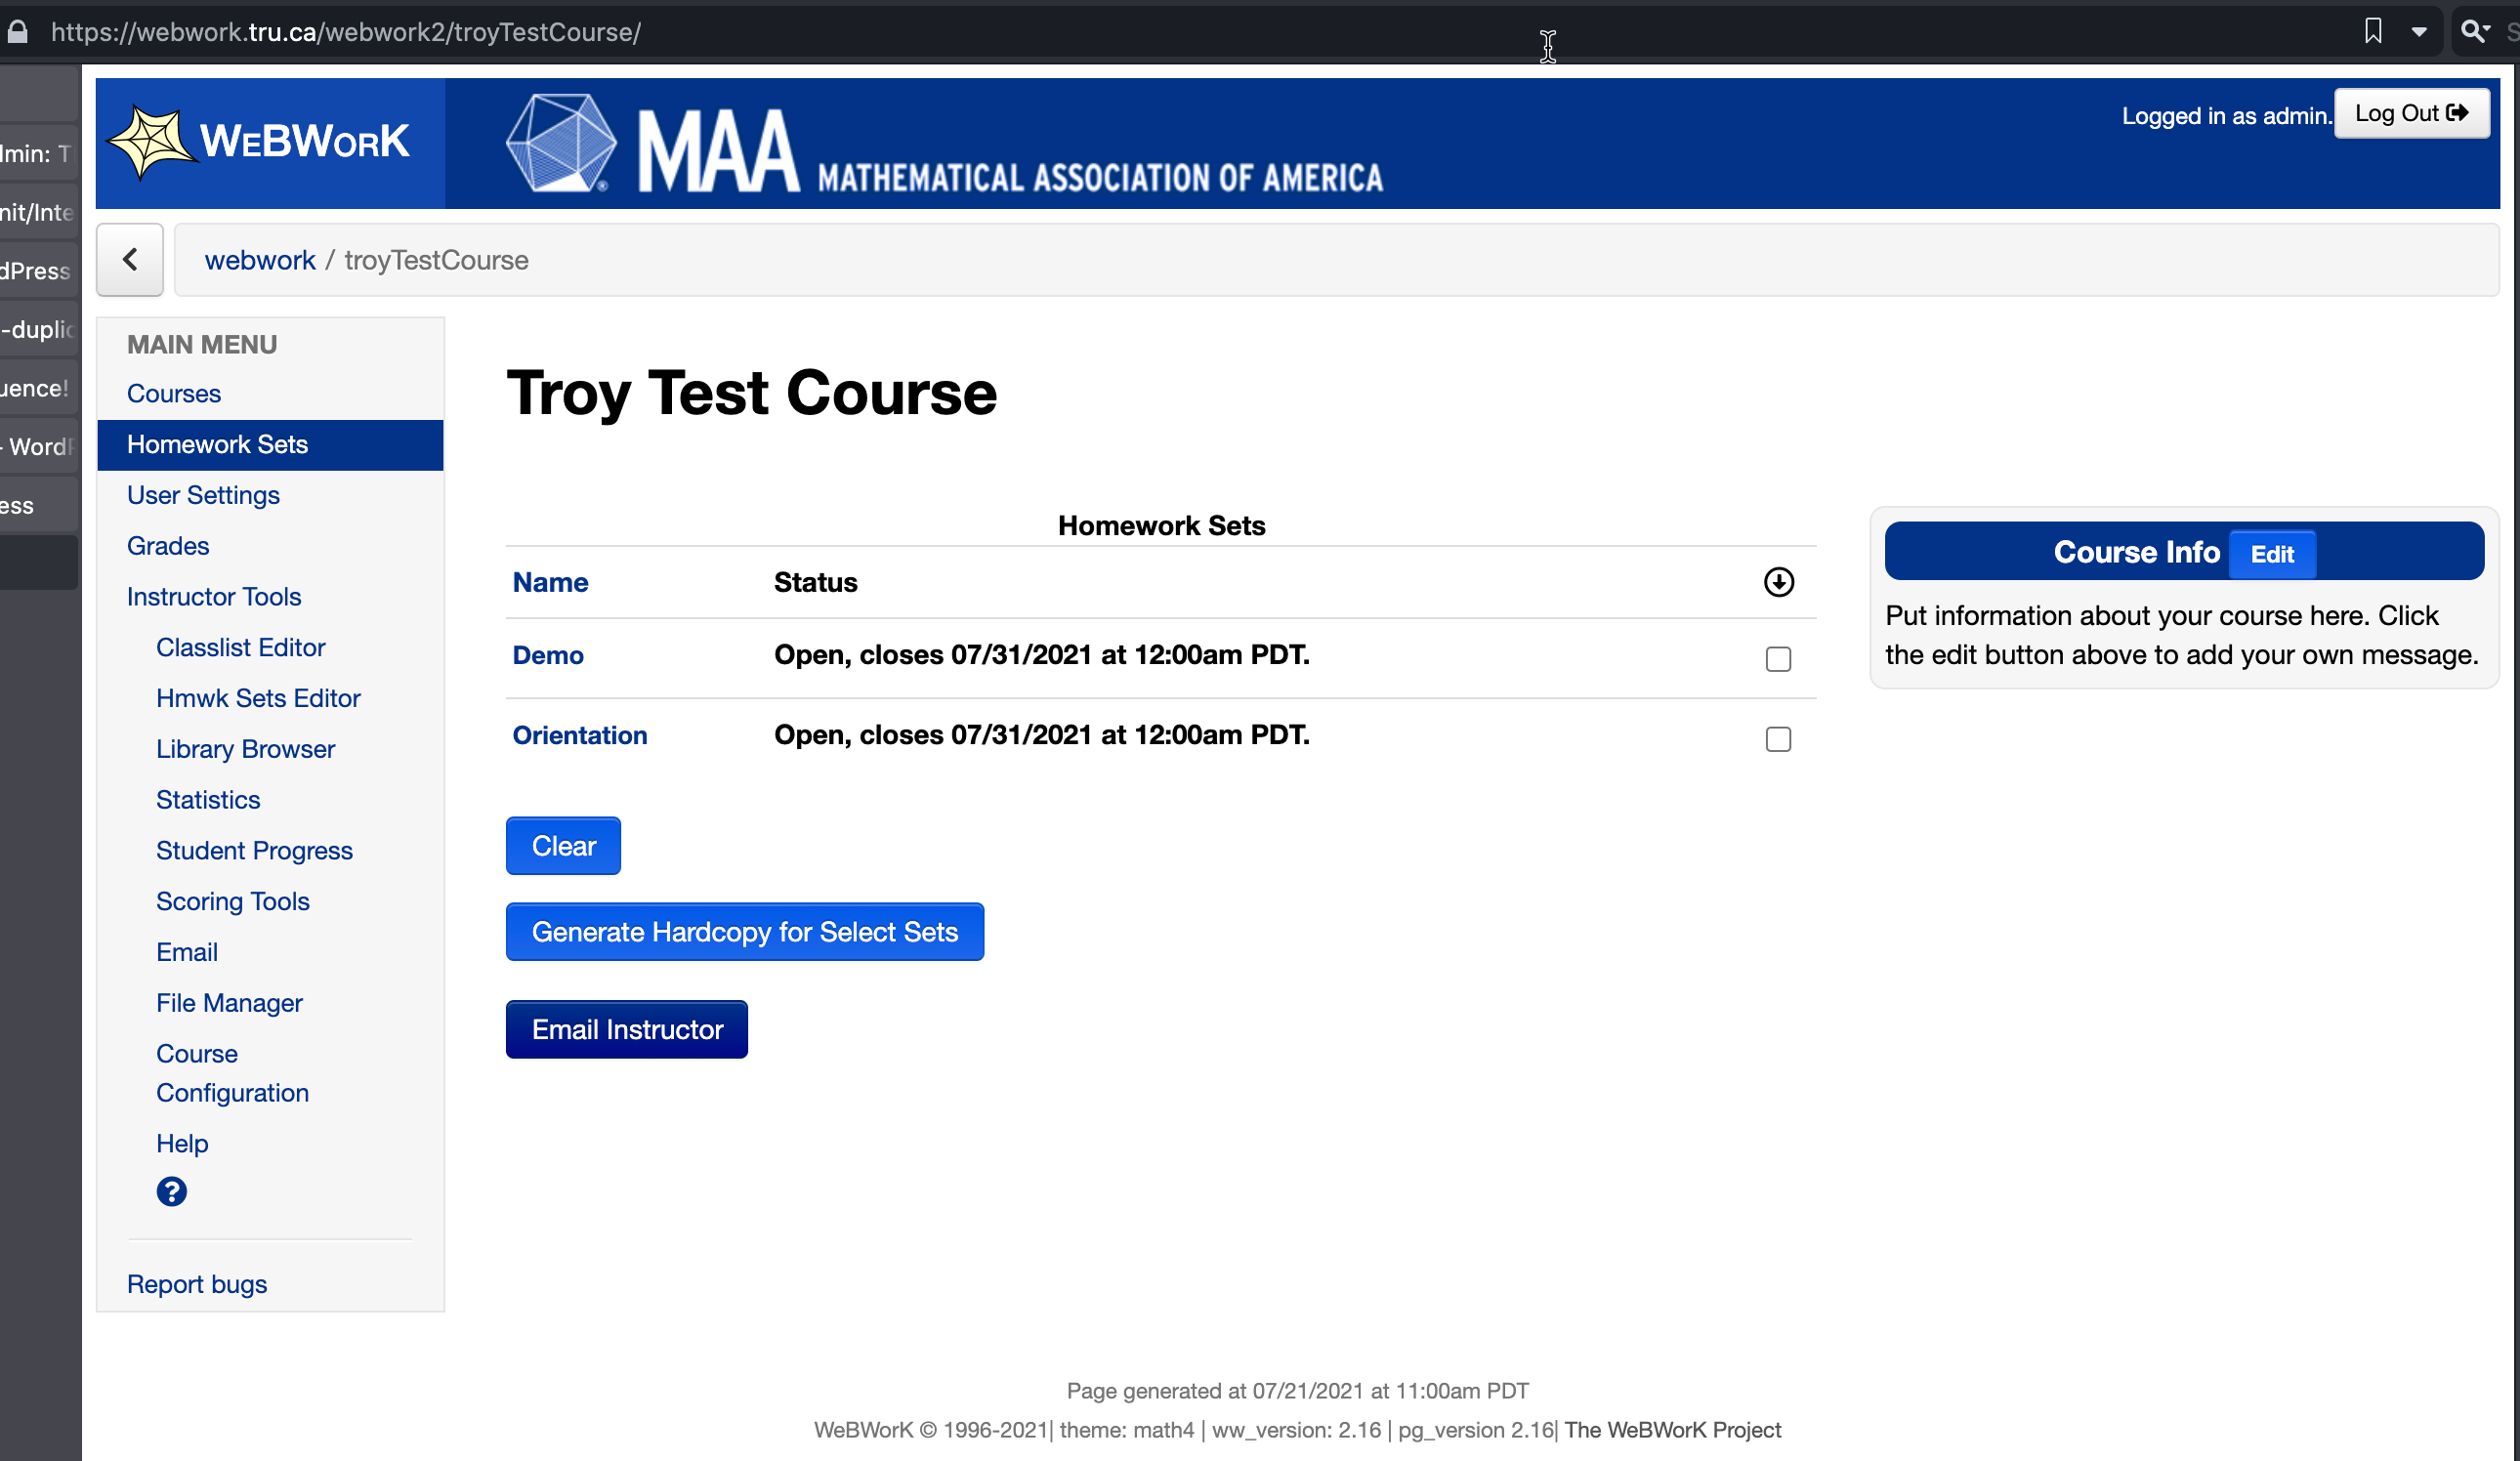
In the address bar is the url (web address) for the specific course being accessed. You will need this address to configure the external tool in Moodle. I generally get ready to add my external tool in Moodle and then copy and paste this address to avoid errors.
Note: we are just discussing the configuration of the external tool here rather than how to use Webwork generally, however I suggest perusing the following documentation: https://webwork.maa.org/documentation.html.
Configuring the External Tool link in Moodle
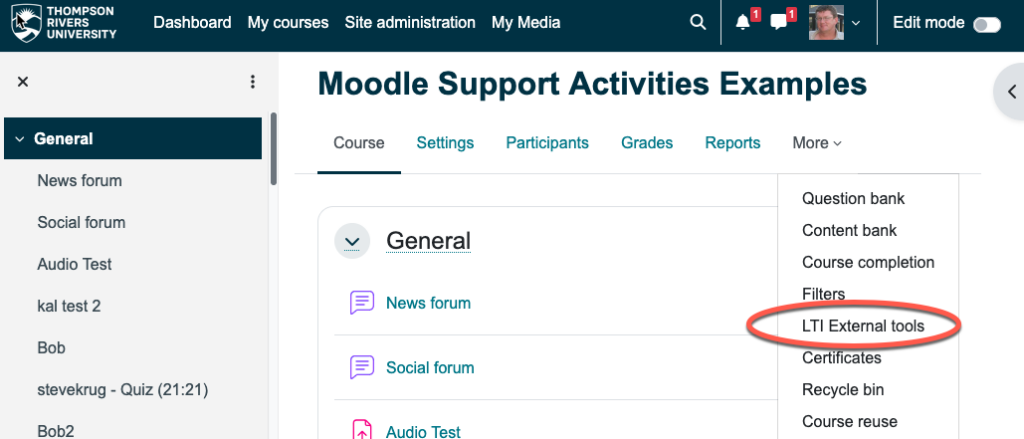
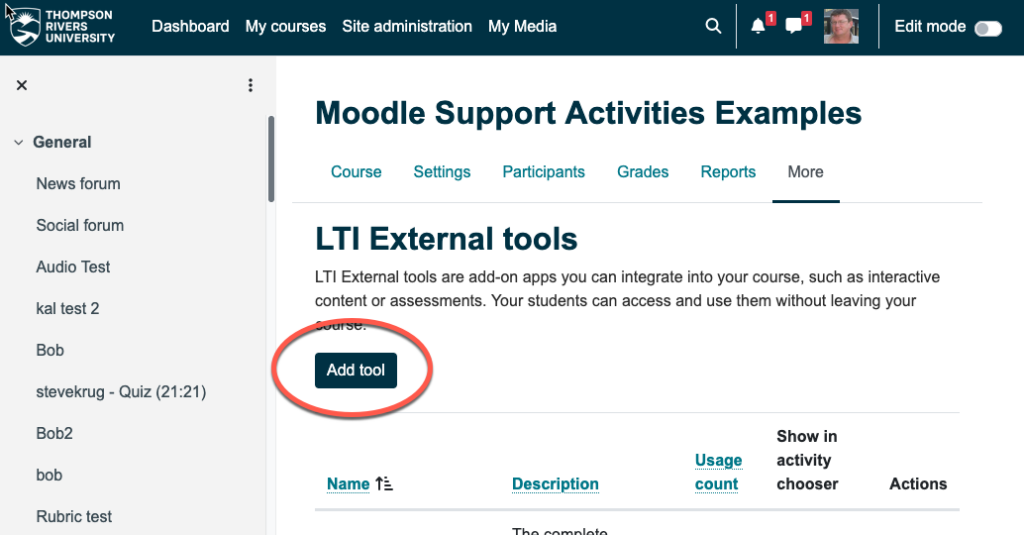
We will be adding the external tool as an activity in the Moodle course, but first we need to add the external tool to the course using the LTI External tools on the “More” menu at the top of the course.
This takes us to the LTI External tools screen where we wish to add the Webwork tool using the “Add tool” button (if you are editing an existing Webwork tool, scroll down the screen and use the three dots in the right-most column to edit).
There are three groups of settings on this screen, we’ll look at them one at a time. Also, the settings that require our attention are numbered, you should leave non-numbered settings alone.
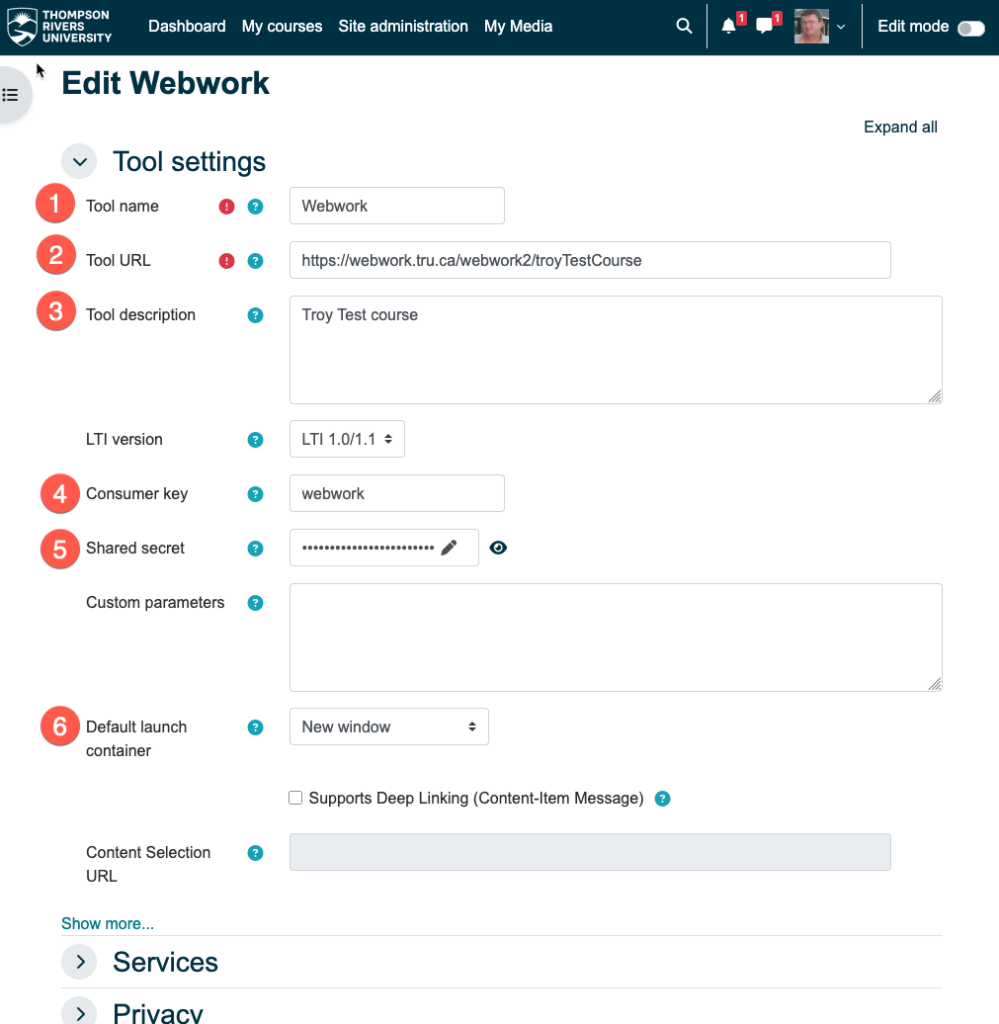
Tool settings section:
- (Required) Give the tool a clever name such as “Webwork” or something similar of your choosing.
- (Required) Despite what the rather confusing pop-up help, use the url for your Webwork course. (See related notes at the bottom of this post.)
- Feel free to put some descriptive text here
- Use “webwork” as in the screen capture above.
- This is a shared secret, or password, for Moodle to get into Webwork. The current Shared secret was emailed out to faculty recently and also appears in the course confirmation requests generated after Sept. 1, 2025
- There are four options here. In the past we have used a “New Window” option where Webwork opens in its own new window leaving the Moodle window as is.
There are two “Embed” options where Webwork opens inside of Moodle, one with blocks, one without. Either way, I’m not a fan of this technically as there is potential for the Moodle and Webwork to interfere with one another. I’m also not a fan visually as the single screen will have more stuff going on and it may be difficult to determine what is Moodle and what is Webwork.
There is also an “Existing window” option that will replace Moodle with Webwork. This might also prove to be annoying.
However, you are free to try which ever one you wish. If there are technical difficulties my only advice will be to select “New Window”
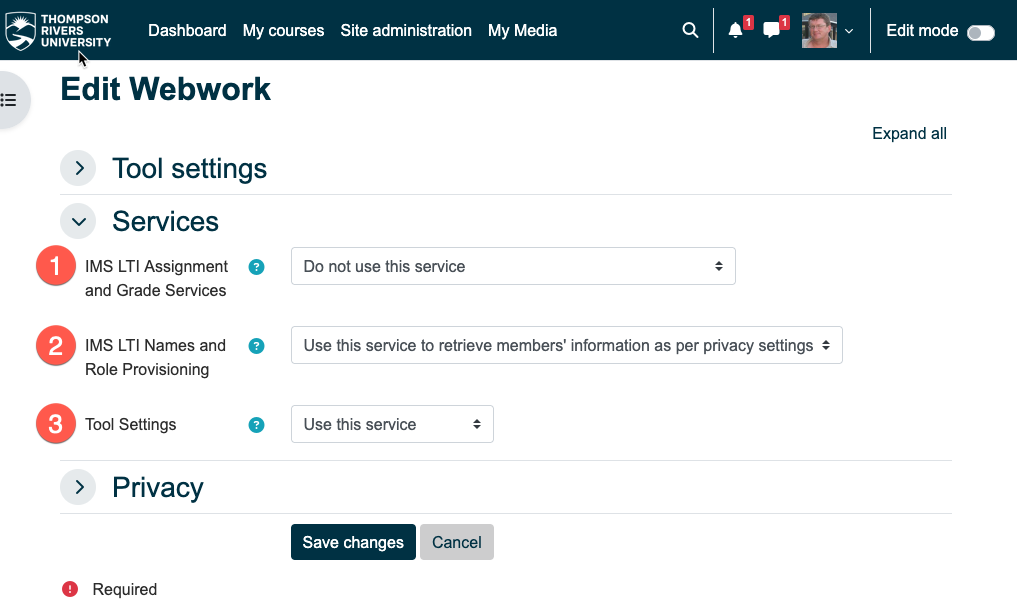
Services section:
The first setting should be set to Do not use this service. (We are working on the grade return feature for 2026.)
Settings 2 and 3 should be set as shown above: 2: Use this service to retrieve members’ information as per privacy settings; and 3: Use this service.
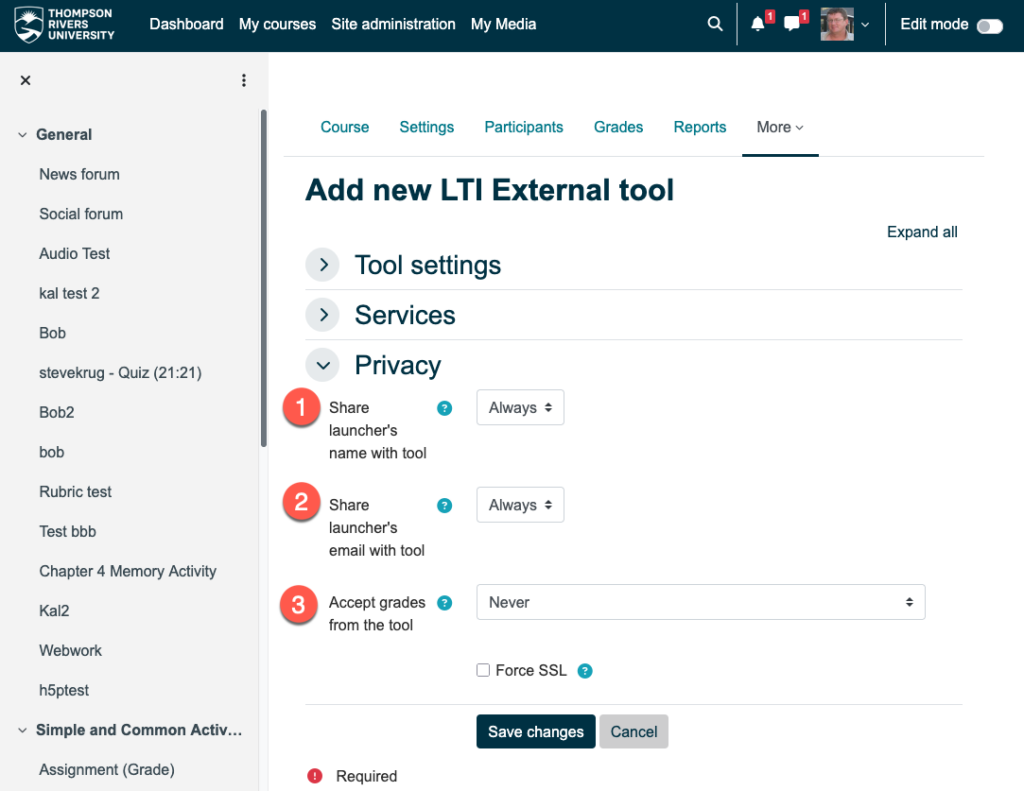
Privacy Settings;
1 & 2: these two settings must be set to Always. Webwork uses these settings to create the users accounts.
3: This should be set to “Never”. (For now, see notes below.)
Okay, we are done with this configuration screen, and now we need to create the Webwork external tool object.
First we need go to the section or area that we want to add the tool to. We also want to activate Edit mode:
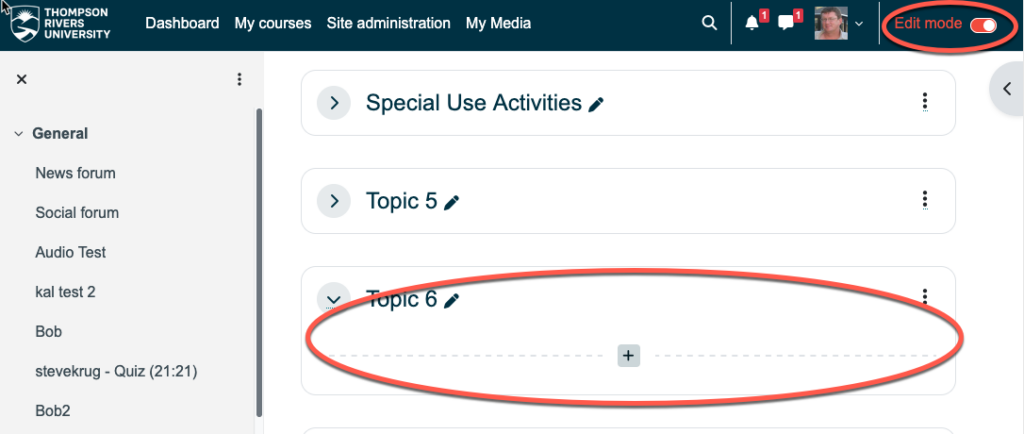
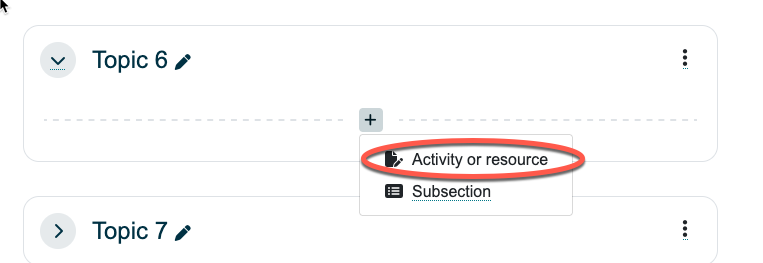
You can see here that I’m poised to add it to the rather cleverly named Topic 6 section. Clicking on the “+” will bring up the following pop-up menu on which we’ll select Activity or Resource.
This in turn will bring up the list of all the activities and resources on which we want to select Webwork or whatever we named the object in the steps above.
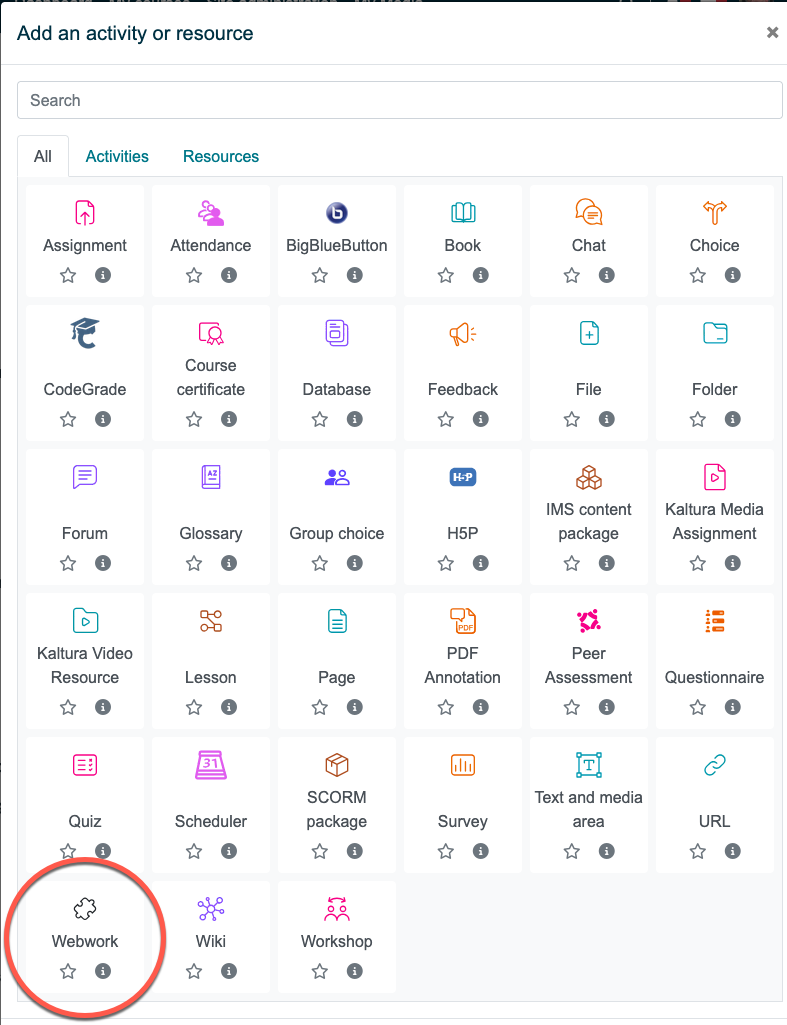
Just to be clear, the red circle above is named “Webwork” because that is the name I gave it in the Tool name field. You could call it anything, for example, if I both don’t feel like type Webwork out and I want the object to appear at the top of the alphabetically sort list, I might call it “aWW”.
Clicking on the Webwork block (in my case) gets us to the following dialog box.
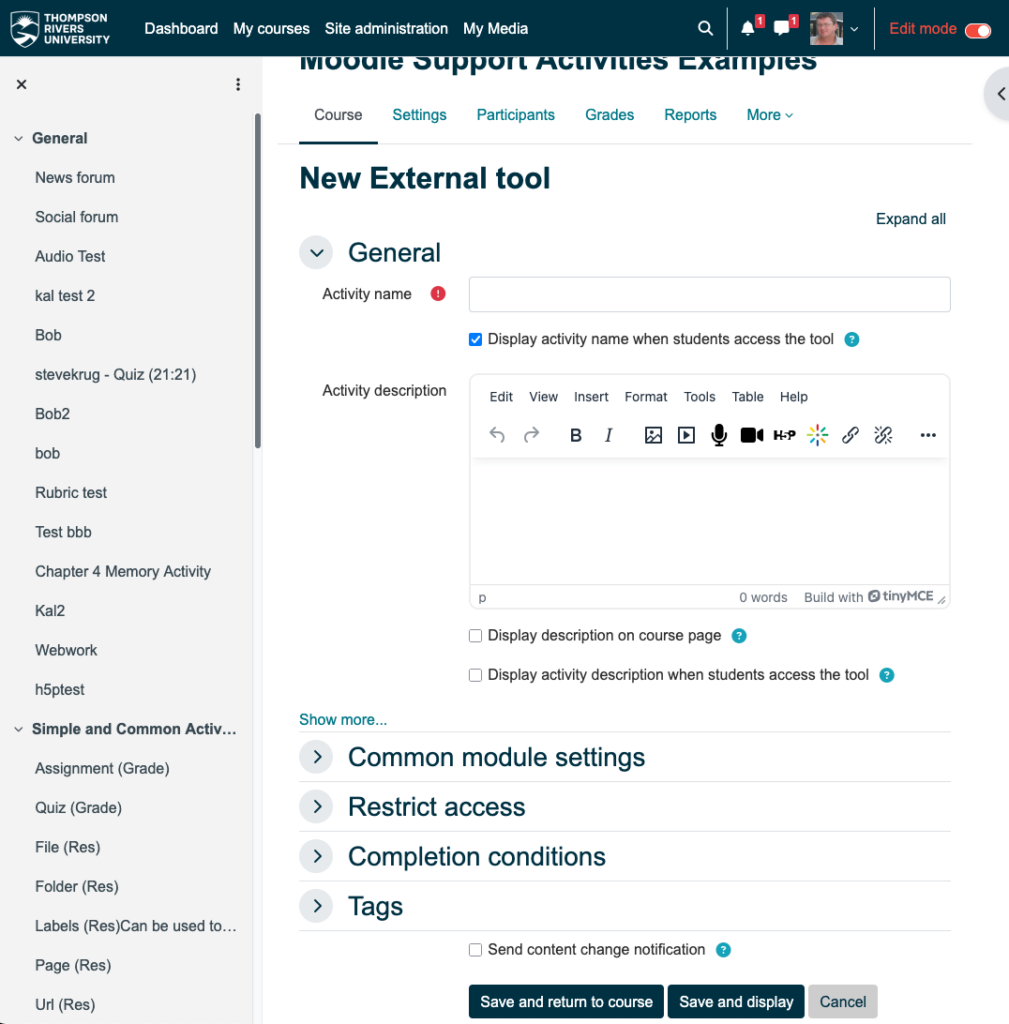
Okay, astute observers will note that much of the configuration is upfront. All that this dialog box really needs is an Activity name. If you wish you can added a description.
This should now be ready to go. As we are quite close to the front of the term, I’ll be extra-attentive to any issues any of you are having. Just let me know.
Promised notes or gazing into the future
I alluded to some notes above. There are two major pieces of functionality that we wish to introduce to the future. Both of them are quite complex and require a generous testing and development period.
In order to implement them safely and responsibly we need a stretch of time beyond what is available between terms. This we can accomplish with our Moodle Sandbox server and (once I free up some time) a sandbox/development environment for Webwork.
Such environments have a number of uses: testing new versions before upgrading, providing a safe space if anyone wants to develop their own Webwork stuff, and for testing our integration between Webwork and Moodle.
The two features right at the top of the list are: deep-linking and lti-grade returns.
Deep Linking, without going down a deep rabbit-hole, enables assignment-level linking of Webwork assignments to Moodle. In other words, instead of one link in Moodle that goes to the whole Webwork course, such links would go from, for example, from a specific Moodle assignment to a specific Webwork assignment. This requires configuration on both services and a great deal of testing.
Once we have Deep Linking in place we can begin to explore and test LTI 1.3 grade returns. Imagine a world where you link an assignment in Moodle to an assignment in Webwork and, when the student is done, Webwork sends the grade back to Moodle which thoughtfully tucks it into the gradebook.
It also seems like the way that Moodle is handling external tools in the latest version adds flexibility for these two initiatives.
We are hoping to get these working by the Winter term, but don’t hold us to that. Time and attention have funny ways of getting away on us.

![A tale of two [mattermost servers, container types, databases]](https://trubox.ca/wp-content/uploads/2018/02/ataleoftwocities-768x600.jpg)


Leave a Reply